Stone repair projects: chips, cracks and damaged edges
A damaged edge or cracked surface needs assessment before a repair is chosen. These step, tile and table projects show existing repair results, with close-ups to help explain how each repair looks in its surrounding stone.
Real project photographs, shown side by side. Results depend on the material and condition. Viewpoint and lighting may differ.
Project 01
Stone step repair
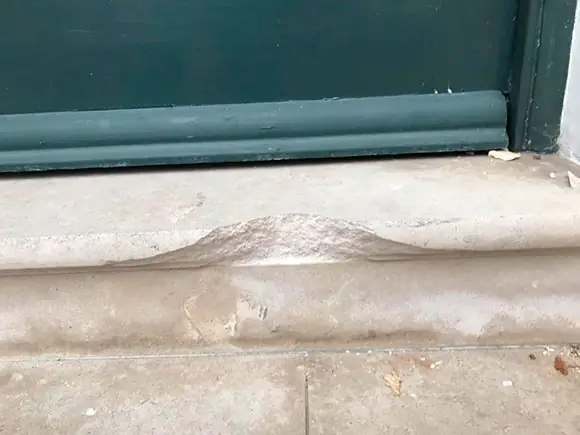
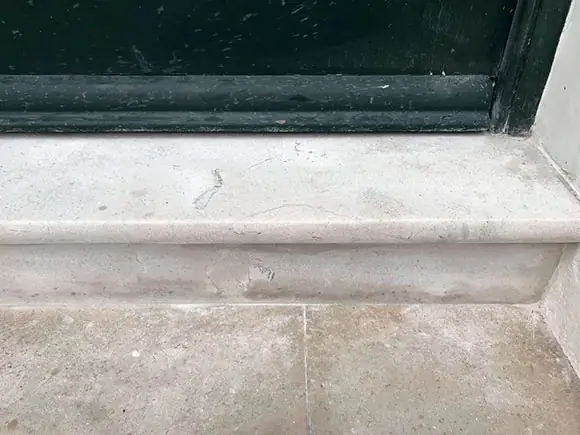
Before: Stone doorstep with a large piece missing from the rounded front edge.After: The doorstep with the missing section reinstated along the front profile.
A substantial loss interrupts the rounded nose of this doorstep in the first photograph. The later view shows a continuous front profile at that position. Colour variation and repair visibility should still be assessed in normal use.
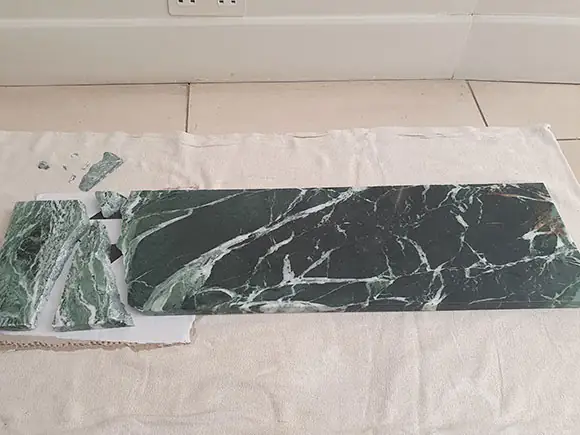
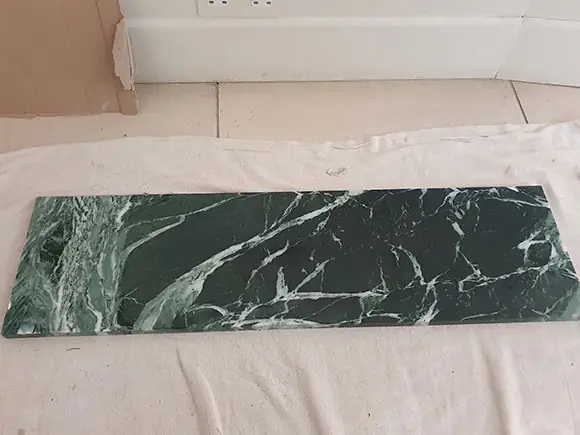
Before: Veined green stone piece with detached fragments resting on a cloth.After: The stone piece reassembled, with the veining aligned across the repaired area.
Detached sections are visible beside the long green stone piece in the first view. The later photograph shows the sections brought together, retaining the pattern across the surface.
Practical note: The stone rests on a cloth in both views. For a similar repair, agree how the work area and surrounding finishes will be protected.
Project 03
Travertine table repair
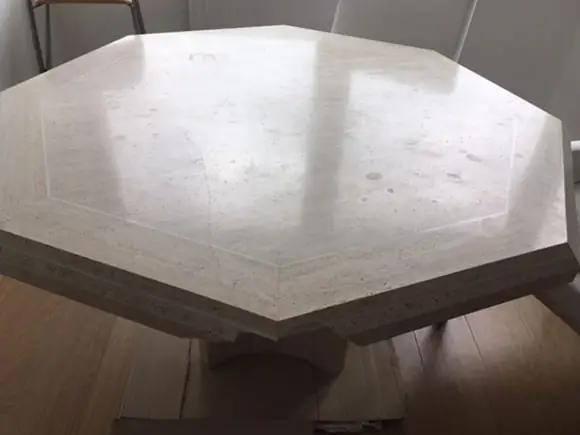
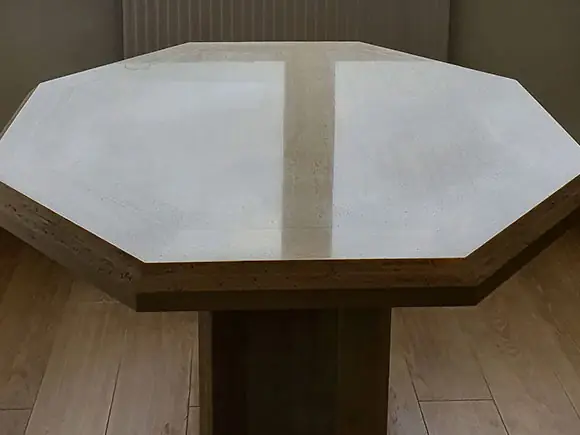
Before: Light-coloured octagonal tabletop with visible marks across its reflective surface.After: The tabletop with a more even-looking surface under different reflected light.
The octagonal shape and timber frame identify the same table in both photographs. The later view shows fewer prominent surface marks, though the changed reflections limit a direct comparison of the finish.
Practical note: For a similar table, agree the intended sheen and whether the top, edges or any existing repairs require separate attention. Discuss stone table refinishing ↗
Explore the treatment options
Cleaning, refinishing and repairs address different problems. Discuss the material and damage before deciding what is suitable.
Essential storage makes this website work. With your permission we would also measure how the site is used, and measure responses to our advertising. Nothing optional loads until you choose. Read our privacy policy and terms and conditions.